Black Knight Pinball Restoration - From BK to BK-Extreme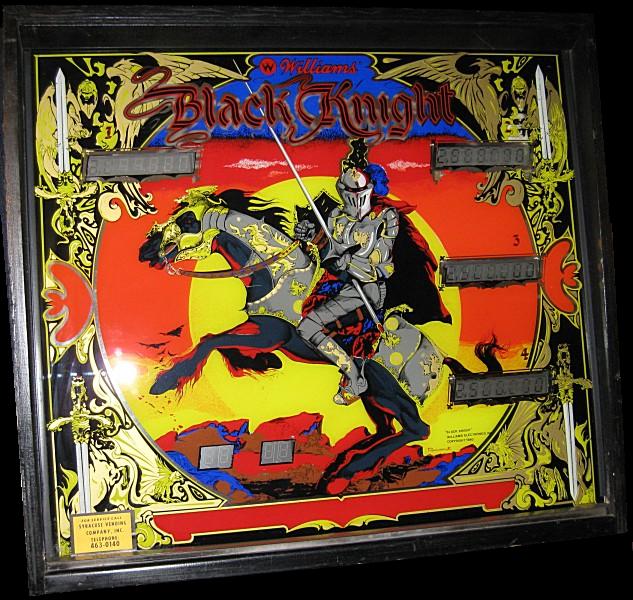 Index
Disassembly and New PartsConsidering that the machine had been fully playable during the prototyping stage and that I like to test the machine out with each additional effect, I found that I was playing the Black Knight more than working on it. However, this problem was quickly resolved when I mistakenly dropped a blob of hot solder onto the Sony receiver's circuit board without noticing it (while soldering up some prototype GI relay circuits). When I turned the machine on, the receiver did not work and I quickly realized what had occurred. So this gave me a good excuse to start tearing everything apart so that I can rebuild it. Luckily I have the full service manual for that receiver and the damaged circuit is fairly straightforward (it is a transistor switching circuit that adust the amplifier's voltage rails between high current (lower voltage) 4 ohm speaker operation or lower current (higher voltage) 8 ohm speaker operation.So began the disassembly process.... which was actually much easier and quicker than the re-assembly process to my chagrin. I first began with the playfield(s) and all associated parts. As playfield parts were removed, they were placed on the bar that we have in the basement. Below is a picture of the original playfield parts taken from the upper and lower playfields. Considering that I got a new set of plastics, all new posts, all new bolts/screws and a few other parts, I only reused the ramps and other related metal playfield parts. 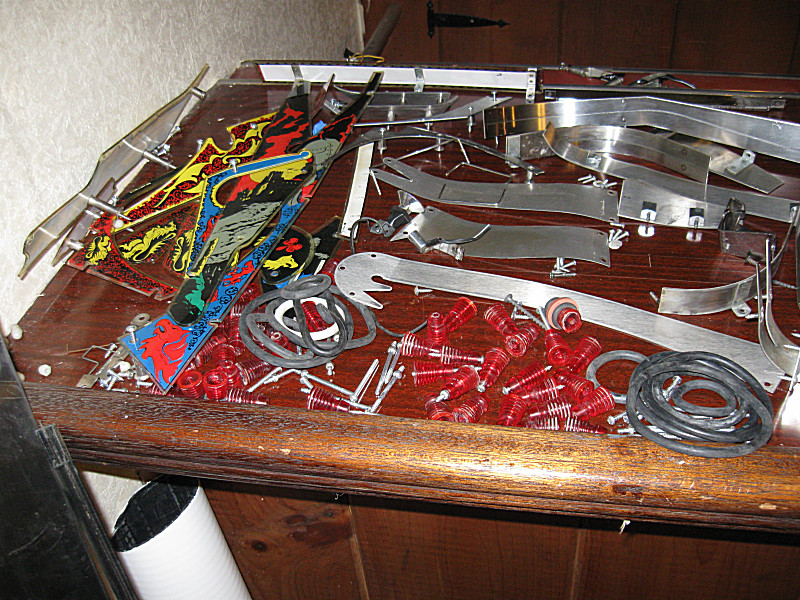 And below is a picture of the bottom side of the original playfield (left), the wiring harness from that playfield (middle), and the new playfield (right). Notice the red and black general illumination (GI) lighting wiring added to the new playfield which is configured for multiple effects banks driven by different triggers (solenoids, lamps, etc). A complete description and schematic will be provided upon completion which will be located in the next section. 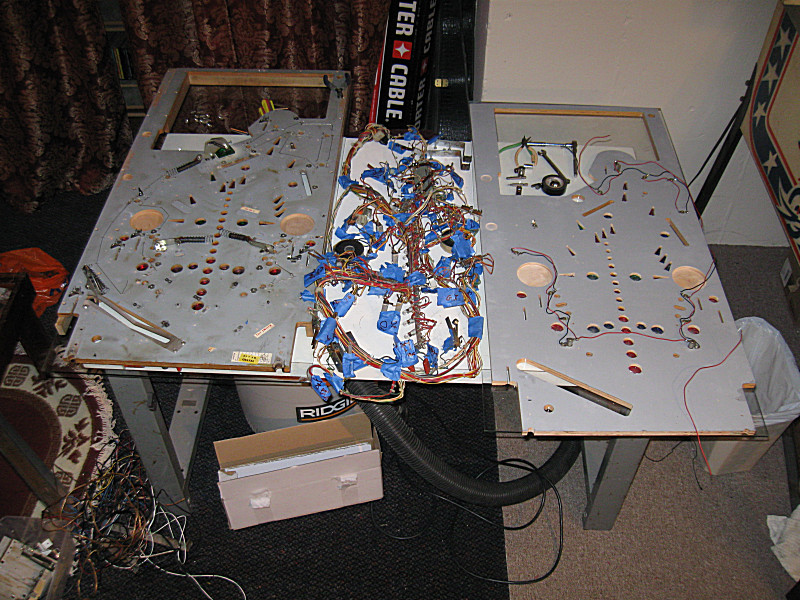 And finally a picture of the top side of the stripped upper playfield as well as the bottom side of the new playfield partially populated. 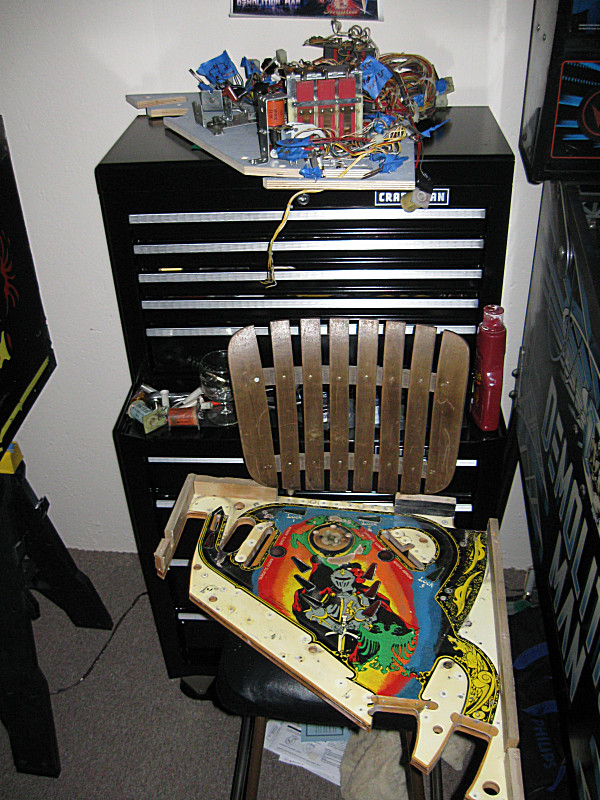 I next removed the head from the cabinet and then removed the display board (the panel that holds the 5 seven-digit display modules and the 293 warm white LEDs that I added). There were structural issues with the interface section between the cabinet and the head which will need to be addressed. Finally, I removed everything from the cabinet (speakers, amps, ringer, power switch, coin door, side rails, legs, and more) and found places to put everything which now took up a good chunk of the basement. Below are a series of pictures of these parts removed from the lower cabinet of the Black Knight. First is a picture of the lower cabinet completly stripped so that I can do some repair work, fill in the gouges and holes and prepair it for the new side art decals that I purchased. 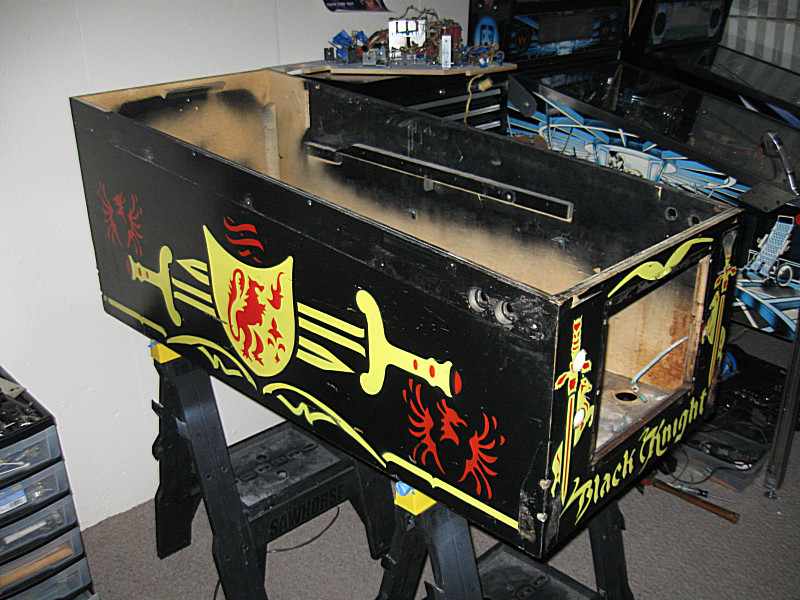 Next is a picture of the old backglass with the new backglass behind it and the new dual-flipper-hole side rails. 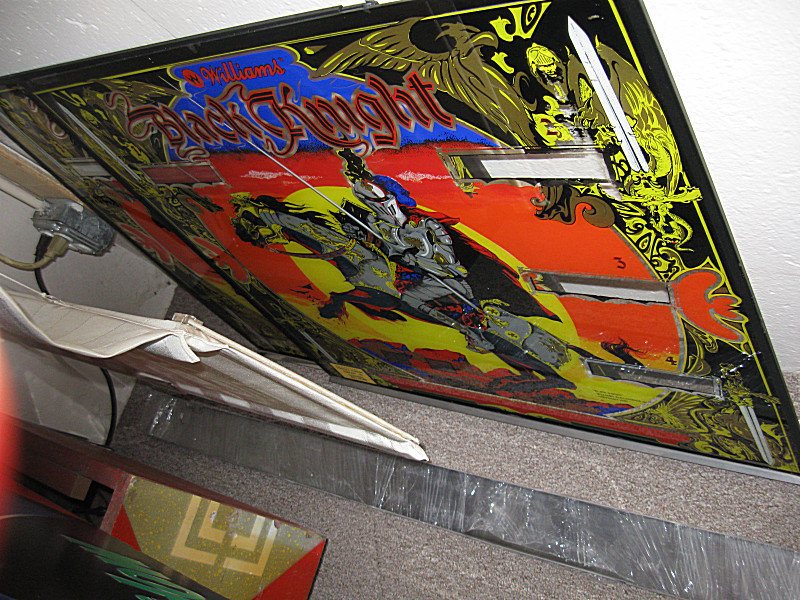 The picture below reveals the tilt/ringer mechanism panel which is normally on the left side of the cabinet. To the right of that are the old side rails and all of the pre-transformer power wiring (as a side note, my Black Knight is an earlier model which has the transformer mounted in the backbox with a modified System 6 power board as opposed to the later models which had the transformer in the back of the cabinet and used a System 7 power board). 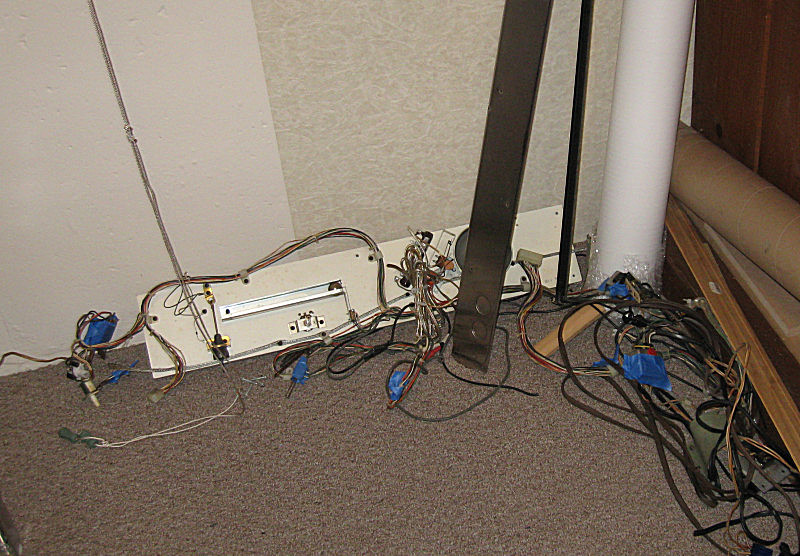 At the other end of the bar are most of the remaining cabinet parts that I removed from the machine along with a few other parts the I may add to it when I put it back together. 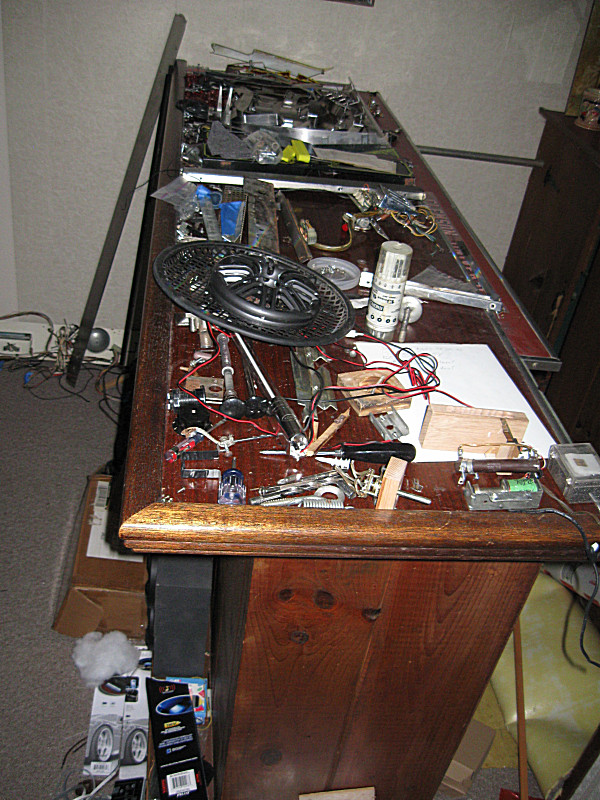 Below is a shot of the backbox with the guts of the Sony 5 x 100 watt receiver sitting on top as well as the aforementioned "interface" section that needs repair (sitting on the sofa). As you can see, the backbox needs a lot of work (sanding and bondo) so that I can paint the parts that need to be painted and smooth out the sides where the head art decals will go. 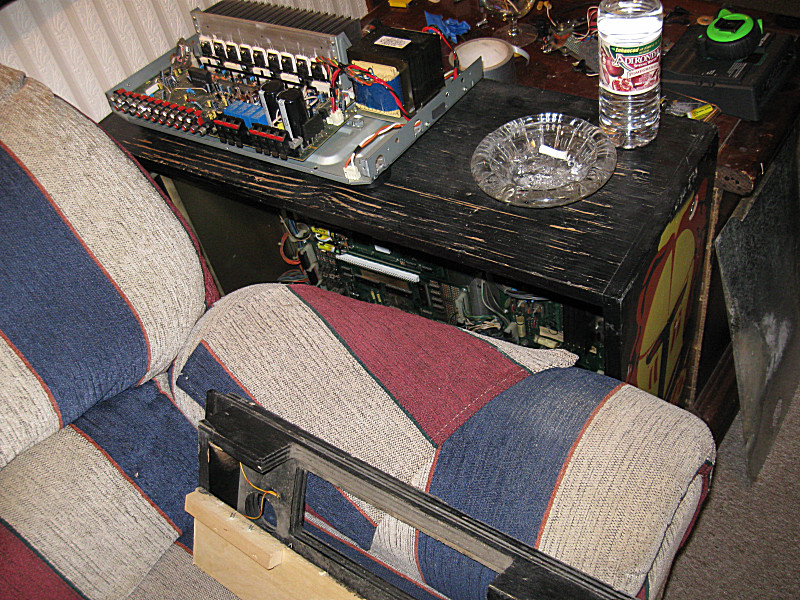 This final picture pretty much encapsulates most of the modifications that I made to the Black Knight pinball machine including new black legs (instead of the original stainless steel), warm white LED backglass lighting (instead of 39 #44/47 lamps), a few cold cathode "neon" light tubes which are audio activated (modified to use a line-level audio input instead of the on-board microphone), the super-bright LED flasher unit (provides a visual effect when the bell rings), and all of the audio stuff which include the 12" DVC subwoofer, dual 6.5" Vifa coaxial speakers (w/dome tweeters), dual Hi Vi B4N 3" full-range speakers, a Tymphany 2" full-range driver, my old Zoom 505 guitar multi-effects pedal (sub-octave processor with echo for the voice signal on the subwoofer channel), a used Behringer UB1622FX-Pro mixer with stereo effects used for the Vifa coaxial speakers, and the "broken" receiver shown in the previous picture. 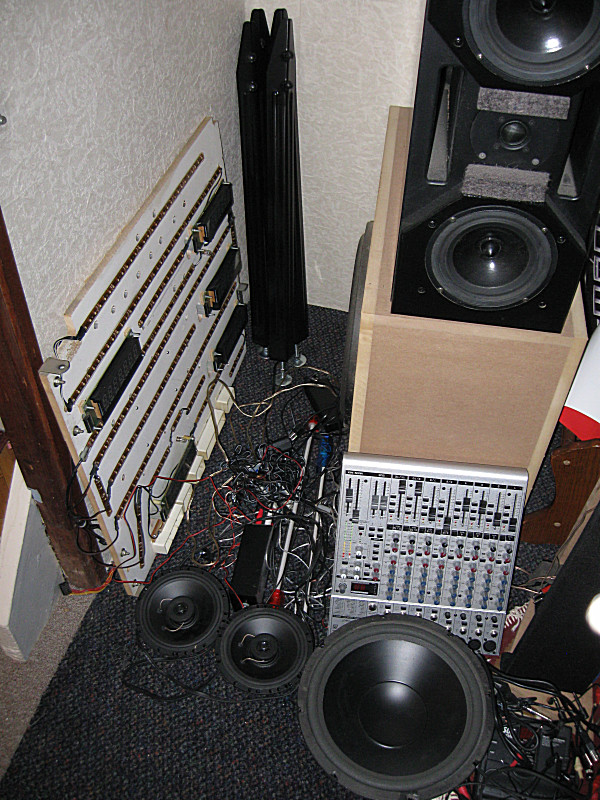 Parts, parts and more parts... The search is on!Now that everything was disassembled I had a much better idea about which parts I needed to not only replace those that were broken or damaged but also replace parts so that I could increase the lifespan of the game and not have to constantly repair parts that may have worked fine but had issues.Although most of the solenoids were not broken in this machine (the most common problem is that they can warp from overheating and compress the coil sleeve) I decided to replace them all. Even this process was a bit daunting because there were quite a few "hacks" done to this machine and the coil sizes did not match what I had seen on other Black Knight pinball machines. This was one of those repairs that falls into the second category above because I could have determined which coils were bad (not non-functional but weak) and only replace those but I chose to replace them all to ensure reliability (and proper gameplay). Another major category of repairs dealt with the original leaf switches installed in my Black Knight pinball machine. The history behind these leaf switches involved Williams using leaf switches (originally in their 1970's electro-mechanical pinball machines) which were assembled improperly. Each leaf switch has two legs with a contact tab at the end of each leg. The contact tabs are riveted to the legs so that one side has a gold-flashed contact and the other side is the back of the rivet. When the switches were assembled, they failed to ensure that the gold-flashed tabs were facing each other with the rivets to the outside. Hence, many switches were operating through a contact between a gold-flashed tab and a rivet which, over time, would cause the contact to wear and corrode especially since dissimilar metals were involved in the current transfer through the contacts. It is fairly commonly known that Williams released an upgrade kit which uses micro-switches instead of the leaf switches in both the ball trough and the multi-ball trough. This upgrade kit is the primary (only?) feature of the Black Knight Limited Edition release For the most part, the LE edition Black Knight was produced based on the popularity of the original so they decided to crank out a couple thousand more. I considered this microswitch upgrade option briefly until I learned of the cost for this type of upgrade either through purchasing the entire kit or the individual parts. I also read that micro-switches aren't a panacea either in terms of reliability (in fact, when properly maintained, leaf switches can handle many more "triggers" than micro-switches). The final deciding factor was the fact that my original ball trough switches were assembled wrong and they still work. So once I was able to find a few sources for most of the leaf switches that I needed I took an inventory of which ones needed to be replaced and which ones don't. For the most part, the only switches that I didn't replace were the 12 leaf switches that are assigned to each of the 12 drop targets because I was able to clean the (properly assembled) tabs which still had their original gold flashing. Just as a note to any other pinball hobbyists regarding cleaning this type of low-current leaf switch (ie. not a tungsten plated flipper EOS switch for example)... you NEVER should use anything abrasive against the contacts because the gold flashing is very thin and can be sanded off very easily. For my switches, I sprayed a bit of "De-Oxit" in order to emulsify some of the dirt and then slid a piece of paper between the tabs as I pressed them together. The dirt was evident on the paper while cleaning and the tabs went from black to gold once again. My buddy recommends nothing more extreme than a brown paper bag in terms of coarseness. The same applies to cleaning relays and I know from first hand experience with a receiver that I worked on years ago that once you sand off the gold plating the relay contacts corrode much quicker and require constant cleaning if you don't replace the relay. All four flipper assemblies have been rebuilt entirely with brand new parts including the coil-stop flipper brackets which in hindsight weren't too bad but it is nice to be absolutely certain that the flippers will have full strength. I basically rebuilt the entire pop-bumper assembly other than the bracket with some parts that I had and some that I purchased and upgraded the bulb socket from a #44/47 bulb to a #555 bulb which tends to have less contact issues over time (other than the socket style, the #555 bulb is identical to a #44 in current draw and brightness). I determined that the armature mechanism for the multiball eject on the upper playfield had been hacked pretty bad and I was fortunately able to find a replacement from Steve at The Pinball Resource (just as a note for those who aren't familiar with Steve's website, if you are looking for a hard to find part and don't see it on his website, be sure to email or call him because he has a LOT of parts in his stockpile and that is how I found some of the switches and other tough to find parts). I'd like to add that if it wasn't for people like Steve, the pinball hobby wouldn't be where it is today because I can recall my dad struggling to find parts back in the early 1980's which today would be considered widely available and I would guess that most of the "hacks" that you see in older pinball machines could have been due to this fact (I know that I cringe when I see some of the hacks that my dad used back then but I must admit, they all worked so I guess that a well-hacked machine is better than a non-functional, non-playable one). The list of parts goes on and includes some modifications relative to the original machine like different colored flipper/magna-save buttons (the originals were white/red respectively and I'm going with black flipper buttons and clear red magna-save buttons which will light up when the associated magna-save is available). I'm going to try a different pop-bumper cap than the opaque red original w/artwork by using a Data-East pop bumper cap which is clear red in color and has a more interesting shape and nice diffraction effects due to the concentric rings in the inside of the cap itself but I do plan to add at least one decal (the center one) to emulate the original to some degree. Another modification is to use blue finned posts for the upper playfield along with a set of blue flipper rubber rings instead of the original red posts which covered the entire playfield, upper and lower. I'm still going with red posts and red flipper rubber rings for the lower playfield and I think that the distinction between the two levels is much more appealing now (as you'll see in some pictures of the upper playfield populated further on in this document). I'm still debating on a few other modifications, primarily which post caps to use and which rubber rings to use. The original post caps were white rubber and while there were a few original ones on my machine when I got it, most had been replaced with the Bally style white plastic acorn nuts. I purchased a set of black rubber post caps (identical to the original except black in color) as well as a set of nickel plated acorn nuts. While I like the look of the black rubber post caps because they tend to disappear revealing more of the artwork on the plastics, I found that they aren't very durable and tend to tear quite easily. They also don't have the strength that a threaded nut does in terms of fastening the plastics or other pieces solidly. However, while the nickel plated acorn nuts are very sturdy and fasten well, they are so shiny and reflective that they stand out quite a bit (like chrome on a black car). So at this point I've been going with the black rubber post caps and you'll see them in most of the pictures of the re-population of the upper and lower playfields. Regarding the rubber rings, the original machine used white rubber rings which was the only option back then. Black rubber rings came out soon after and in general tend to be a bit stiffer, less "bouncy", and have a bit less grip to them in terms of how a spinning ball reacts to the rubber ring (the ball is more likely to grip the white rubber ring and its spin will propel it while the ball will tend to slip a bit more against a black rubber ring). In general white rubber rings exaggerate the ball physics and english a bit more than the black rubber rings. I had already decided that I like the look of the black rubber rings but was concerned about altering the gameplay relative to the original. However, considering that the new playfield will be a lot slicker than the original NOS playfield which was never clearcoated, ball physics and english will be very extreme due to the the much smoother playfield surface which allows the ball to spin more freely. My instincts tell me that the combination of a new, clearcoated playfield along with the white rubber rings would lead to too much english on the ball making it even more difficult to control than it already is. Hence, I figure that the black rubber rings should help counteract the slickness of the new playfield and provide just the right amount of english on the pinball. We'll have to wait and see if I'm correct! While I didn't replace the original playfield and GI lamp sockets other than a few, I did add 15 #555 bulb laydown sockets which will provide the additional GI lighting to the upper and lower playfields as well as three #555 Stern-type spotlights (one for the upper PF and two for the lower PF). Considering that I've removed 39 GI lamps from the backbox circuit I'm pretty confident that adding 15 playfield GI lamps to the existing 20 or so GI playfield lamps will not strain the transformer like the full load of 60 lamps did before (assuming #44 bulbs, the current draw should drop from 15 amps to just under 9 amps). As I mentioned above, there will be further details and pictures regarding some of the parts replaced as well as all of the modifications which make this version of the Black Knight somewhat unique. Considering that this section covers some of the new parts that were needed to restore and/or modify my Black Knight pinball machine, I might as well provide a list of some of the most of the new parts that I purchased below...
Next Page - Playfield Rebuilds Part 1 |