Black Knight Pinball Restoration - From BK to BK-Extreme
Index
Cabinet Restoration
Project Overview
It is now 1 year and 4 months since I acquired the Black Knight and about 8 months since I began prototyping and modifying it. While the prototyping phase required countless hours
of conceptual design work, I was able to play and test out the machine between each modification. However, when February came and I damaged the Sony surround sound receiver while
adding a few final lighting effects, the fun diminished and I began to realize the true scope of the project during disassembly of the machine. It took a lot of time and patience to find
all of the remaining parts that I needed and complications with the table saw and playfields forced me to alter my course during the restoration process.
The playfield swap turned out to require much more precision and time than I expected based on previous experience with my Evel Knievel pinball machine. The process of ensuring
the location of each part and then drilling the appropriate hole, in the right order, really took up a lot of time but after a month's worth of hard work I managed to complete both playfields.
Next I had to repair the cabinet and this is the point where I hit the proverbial "wall" as long distance runners call it. My motivation dropped and I lost sight of the goal even though
I was so much closer than before to finishing the project. It was also a case of all work (on the Black Knight) and no play (of the Black Knight).
A bit of philosophy regarding taking on and finishing large projects
While the prototyping phase took a lot of time, thought and energy it was quite easy to stay motivated because with each modification I was able to see the results while I played the
pinball machine. However, while technically the Black Knight was a project from day one, it seemed more like a pinball machine in the basement that I could play or mess around
with at any time. It wasn't until I tore everything apart that I began to consider it a true project and soon after it seemed to be a much bigger project than I had anticipated.
It was at this time that it was very overwhelming to look at all of the pieces of the Black Knight and consider how much work was left to be done. However, while starting this stage
of the project I discovered that if I go one step at a time with each task that needed to be completed, it was easier to proceed by considering the progress that was made as each
task was finished rather than focusing on the finished project and pondering how much work was still left to be done. I guess that it is similar to a marathon runner in that
the runner shouldn't consider how much farther there is to run to get to the finish line but instead focus on each step which is a step further from the starting line. At the same
time while progress was being made, the pile of tasks yet to be completed began to diminish.
This strategy seemed to work well for a while, at least until I completed the playfield swap and was ready to move on to the cabinet work. My motivation had dropped considerably
and my philosophy needed to change at this point in the course of the project. Rather than focus on each stage of the project that remained individually while ignoring the goal and
the benefits of completing the project (getting to play it), I needed to change my strategy. While there was still a lot more work to be done (cabinet + decals, topper construction,
remaining circuitry, etc) it was at this time that I decided to start focusing on the "finish line" so to speak in order to regain the momentum that I once had. I think the same
analogy with the marathon runner holds true here as well because there has to be some point in the race where you must tell yourself that it is only a little bit further and even
though you may feel like you don't have the strength, energy or will to finish the race, you've run so far to get to this point and the thought of crossing the finish line is enough
to get you there.
Even though the project seemed to be on a temporary vaction, I still made progress in other areas of the restoration. Rather than spend the money and time on parts and repair
of the original Sony 5x100W surround sound receiver I managed to find a great deal on a used Yamaha RX-V461 5x100W surround sound receiver (w/out remote control)
for $80 on Ebay and also picked up a brand new remote control for $40. This is a newer model receiver than the Sony with a few extra features and in a smaller enclosure. The
plan is to mount the new receiver where the old one was (near the back of the lower cabinet) except with the front panel facing forward so that the display can be seen by
looking through the open coin door and the volume level or any other adjustments can be made using the remote control which will be stored near the coin door opening.
By installing the Yamaha receiver without taking it apart there is less of a chance that something will fall into the unit and create a short circuit.
Another nice feature of this receiver (something that I actually thought of when I had the Sony installed) is that you can set a limit on the maximum volume of the receiver.
When adjusting the volume level on the Sony receiver during the prototyping stage I noticed that I could only turn the volume up to about -15 dB maximum at which point the power
of the 12" subwoofer was so overwhelming that the playfield glass and backglass would begin to rattle violently. I feared what might happen if somebody mistakenly turned the
volume beyond this point (the maximum level is +15dB which is 30dB louder than the maximum "comfortable" setting before the machine would start rattling apart.
So with that said, an unexpected modification arised and should turn out to be an improvement in the overall design both in function and asthetics.
A second "distraction" ensued when I stumbled upon some used high-end audio equipment. I managed to find a Krell Showcase surround sound processor/preamp
($4000 in 2002), a B&K Reference 20 surround sound processor/preamp ($2500 in 1998), an Outlaw 750 5x165W power amplifier ($1099 in 1998) and some various
Monster Cable brand interconnects. I sold the B&K to my friend who was looking to start a basic DVD home theater system. I kept the Krell and Outlaw for myself
along with the Monster Cable interconnects for a grand total of just over $400 which was the only way that I could ever afford audio gear of this level and I was pleasantly
surprised at the improvement in the sound of my system. I didn't quite expect to hear so much improvement in upgrading my amplifier and preamplifier and I would have
to say that some of my theories on audio equipment need some modification to explain the degree of improvement in the sound quality. It was nice to know that my
homemade speakers (Alpheus MkII, Asterion, Dionysus) are clear enough to reveal these improvements and I'm sure that this new platform will come in handy when it
comes time to start designing some new speakers.
With that said, lack of motivation as well as distractions were keeping the Black Knight from being finished. Nearly a year after I took the machine apart I asked my brother
to help me refinish the cabinet and after a few months he had finished the repair work on the head of the cabinet. I then proceeded to spray paint the head and finally begin
applying the cabinet decals that I had purchased.
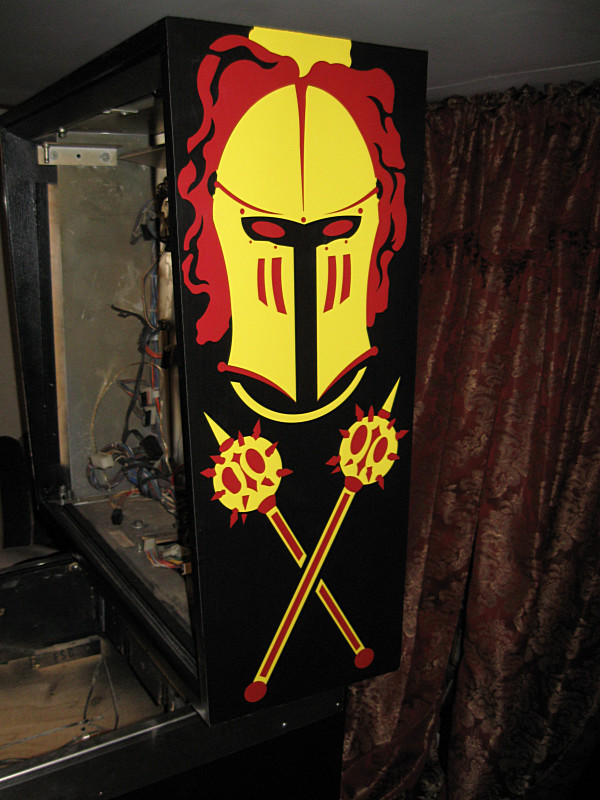
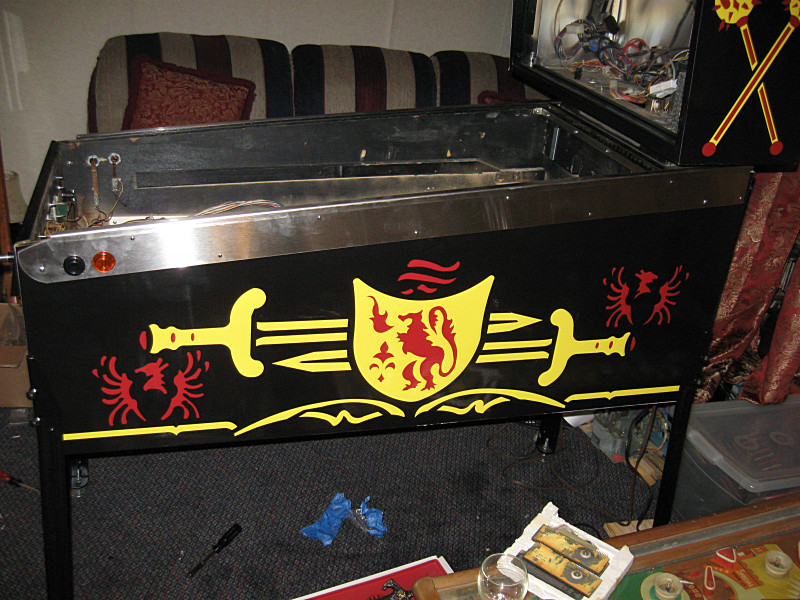
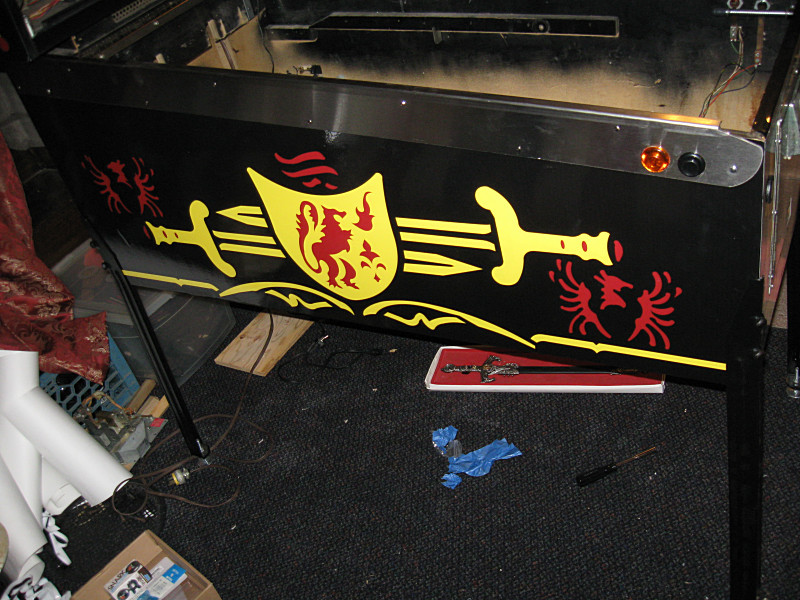
Cabinet Decals
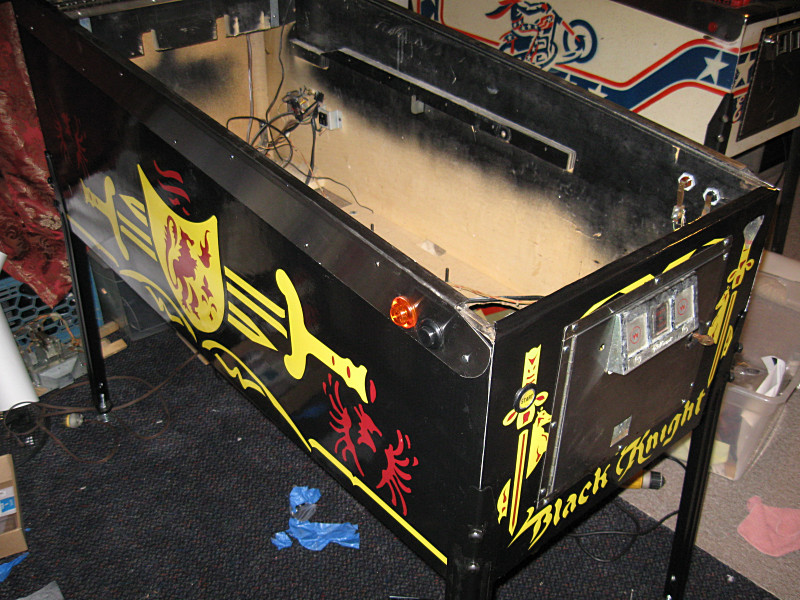
I had two options regarding restoring the cabinet of the Black Knight. One option would have been to buy the cabinet stencils, paint the entire cabinet and head black and then
spray the yellow and red layers. I chose instead to go with thick, mylar cabinet decals which leave a more glossy finish to the cabinet. It was very tricky aligning the decals
but it went fairly well and I'm very happy with the results. I had also purchased new stainless steel side rails which were installed following the cabinet decals. The coin door
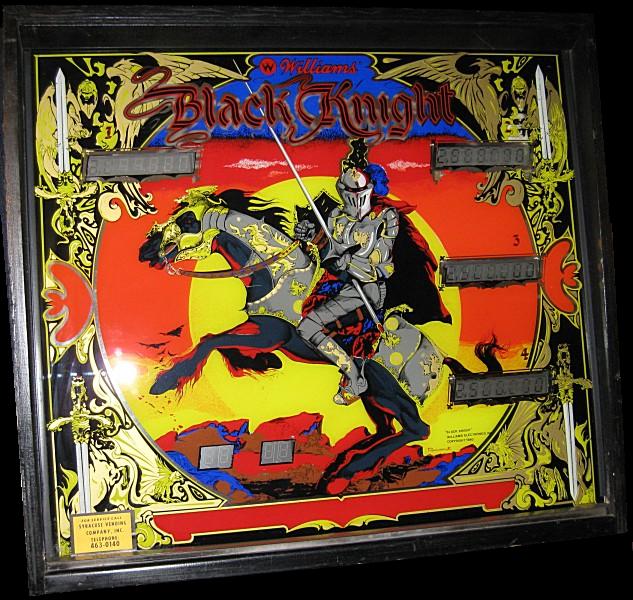
is a replacement for the original which was very dented. Below are some pictures of the finished cabinet(s)...

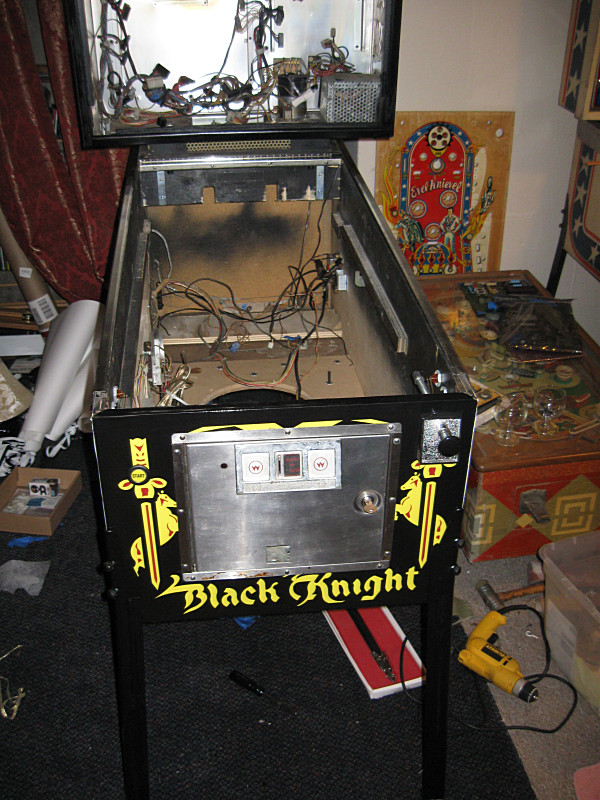
With the cabinet fully restored it was time now to start mounting the PC boards to the head and installing some of the cabinet parts prior to installing the playfield.
 |
|