Black Knight Pinball Restoration - From BK to BK-Extreme
Index
Playfield Rebuilds - Part 2
Lower Playfield Rebuild
Now that both sides of the upper playfield were pretty much finished, I moved on to the lower playfield. At this point nothing had been mounted to the rear side of the lower playfield
other than the GI lamp sockets and my modified wiring scheme for them (indicated by the red and black wires). I focused on mounting the ball trough and flipper bracket assemblies
first. I then moved onto mounting all of the roll-over switch hardware and new leaf switches. I next Installed the ball trough eject armature and coil bracket assemblies as well as
those for both slingshots (in conjunction with the slingshot solenoid and scoring switches) and the multi-ball eject. I verified and drilled holes for
the locations of all of the wiring harness brackets as well as the lamp brackets. I added the magnets and drop target banks somewhere during this stage as well as all remaining
parts.
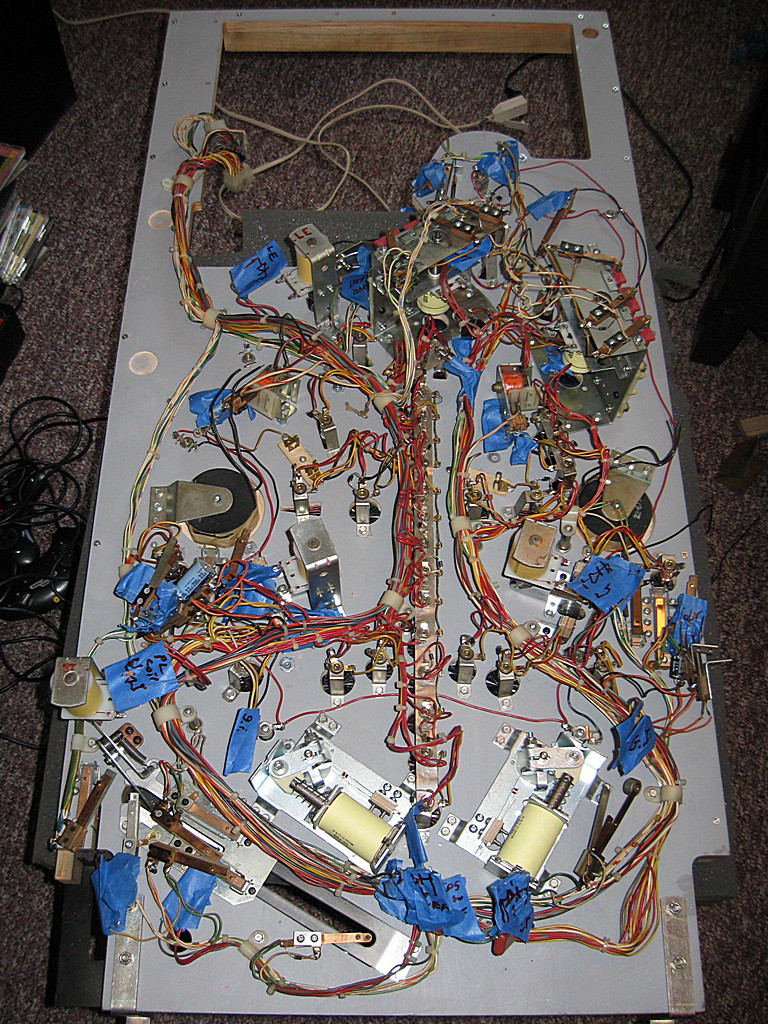
The picture below is of the bottom side of the lower playfield with all hardware mounted as well as the wiring harness. However, all of the original switches are still connected to the
wiring harness and most of them will have to be removed so that the wires can be soldered to the new leaf switches along with a new diode. All of the original coils have been removed
from the wiring harness since they have all been replaced with new once and the wires will need to be soldered to the new solenoids. The abundance of blue tape is a good indication
of how many switches and solenoids need to be soldered to the wiring harness.
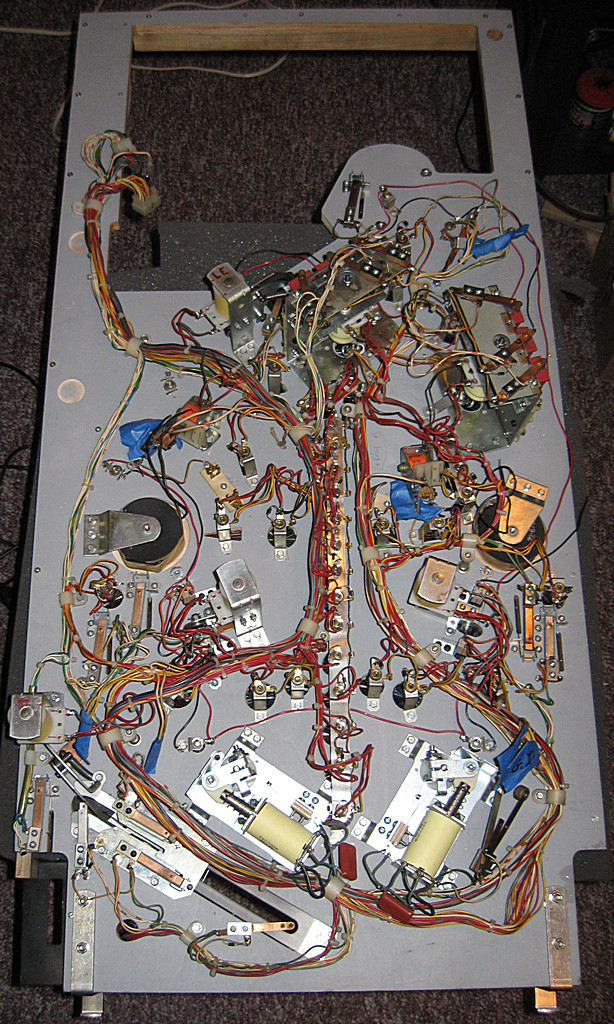
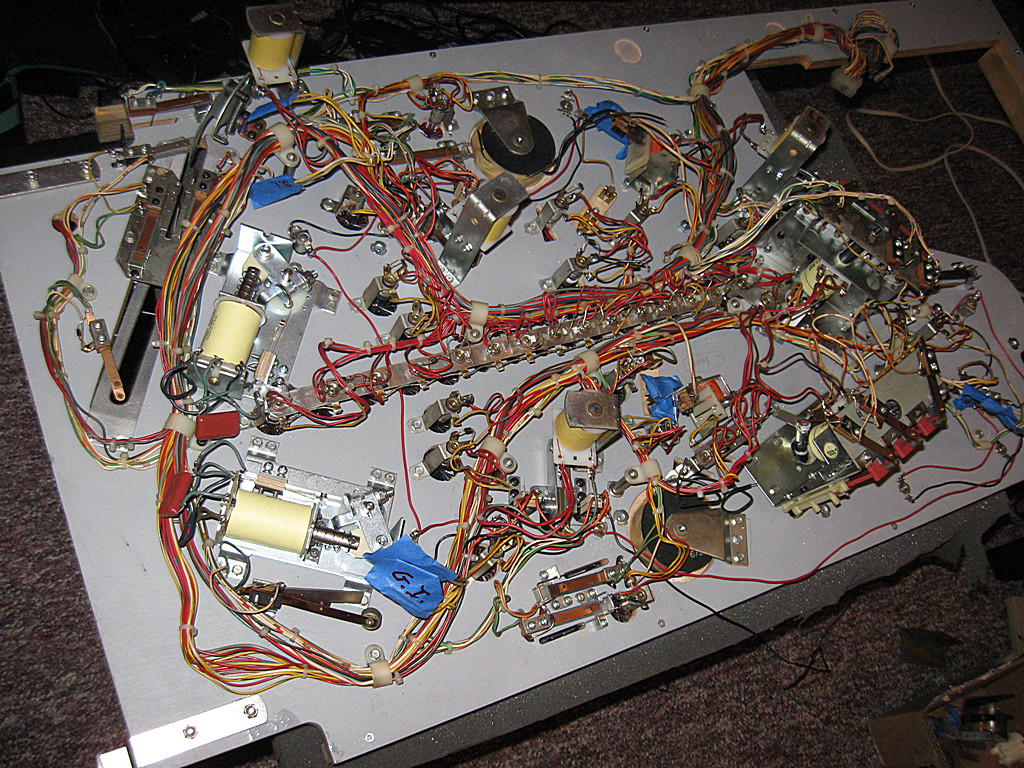
Fast forward a bit and now most of the blue tape is gone because almost everything has been installed. The only things not installed in this picture are the magnet relays and GI
wiring. As I did with the upper playfield, I plan to use the yellow/white GI source voltage wires to feed the relays which trigger the GI lighting effects. Here are a few pictures below.
I had considered replacing the original solenoid triggered magna-save relays with a pair of standard 10A DPDT 24V relays which would probably be more reliable over time but instead
ended up cleaning and adjusting the contacts of the original ones and if they ever become flaky, then I will convert them.
The story of the Table Saw
Considering that I had already completed the top and bottom sides of the upper playfield as well as the bottom side of the lower playfield, I really needed to make a new set of wooden
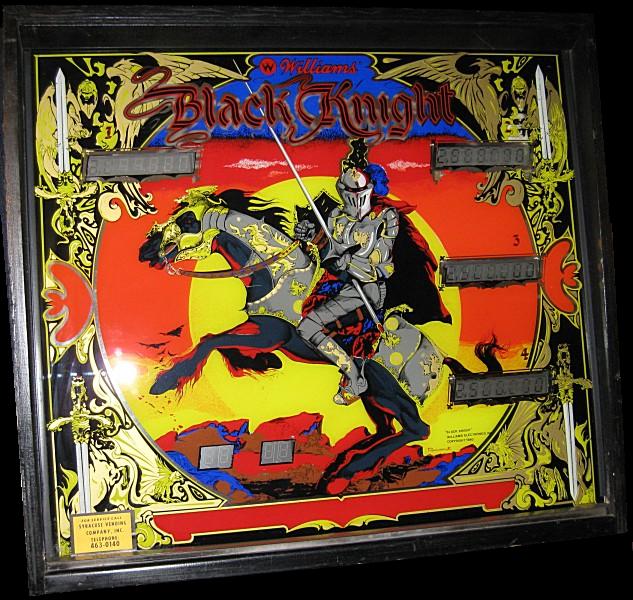
side rails so that I could connect the two playfields together and mount the remaining parts. The original rails were made of pine with a vinyl adhesive woodgrain pattern which was meant
to emulate oak. The old rails from my machine were in pretty bad shape with a lot of splits, holes in the wrong locations (relative to the new playfield) and was very yellowed/faded.
I decided to use real solid oak for the new rails so I picked up a few pieces of 1/2" and 3/4" thick oak which I would rip into two rail-height sections and I was hoping to use my new
table saw to cut those rails.
It was late winter, 2010, when I stumbled upon a speaker forum post which talked about certain items going on clearance at Home Depot. There were two things that caught my eye
including a great deal on a Dewalt sliding miter saw as well as a granite top Ridgid table saw but the table saw cost a bit more and weighs 600 pounds so I thought that it might not be
practical. It was the first morning of the sale on those items so I called around to a few Home Depots asking if they had the Dewalt miter saw in stock and I believe that most were
out of stock and the rest either had the display model or one left in stock. So dad and I proceed to go to the first Home Depot only to see somebody carting out the display model
and by the time we got to the rest of the Home Depots nearby all of them were out of stock.
Once I determined that I wasn't going to be able to buy the Dewalt sliding miter saw, I thought about how I actually needed a table saw much more than a miter saw and stopped by a
local (the closest) Home Depot to find that they had one Ridgid 4511 Granite Top Table Saw left in stock and there was also a display unit set up. I paced back and forth while I
studied the floor model and contemplated whether or not I wanted to buy this table saw and then have to figure out how to get it home. Well, I couldn't resist such a good deal and
there were a few features that I really liked about this table saw including the large granite top which won't rust out in the garage and provides a very large working surface as well
as a long rip fence which is very accurate. When I looked at the prices of the other table saws in the store, I realized that I could never afford something better than this and at any
price, this seemed to be the best table saw in the store. So I paid $399 for this saw and while the original price wasn't as high as that of most granite top table saws, I would have to
say that this one can compete with nearly identical models that sell for $1000 or more.
However, the fun will begin first when I try to get the 600 pound monster home and will be followed by a sequence of unfortunate events. To get the saw home, we first had to remove it
from its metal packaging crate and take it apart. We put the granite table top pieces in one car and the motor/blade assembly in another. Assembly went well until I was attaching the
left granite wing of the table saw and while tightening a nut I heard the granite crack. A chunk of granite had lifted slightly and I was hoping that the warranty would cover the replacement
of that part. I immediately registered the saw at Ridgid's site but didn't get verification until quite a few months later. In the meantime I tried to exchange the broken granite wing
at the local Ridgid distributor but he wanted me to bring the entire 600 pound saw with me for some kind of proof. I though this was absurd but I found out that I could have a representative
from Ridgid verify my saw so I could get the part. I temporarily gave up on the saw as spring/summer approached and I was busy doing other things.
Now it is winter of 2011 when I realize that I'm going to need to fix the table saw so that I can rip the oak side rails to the proper height. My dad and I managed to glue the chipped piece
of granite back in place and I was able to assemble the rest of the table saw. So I finally have the saw all together and I'm adjusting the blade angle to 90 degrees when I hear something
break. It turns out that I broke the shaft that adjusts the tilt angle of the blade and I have a feeling that it had been weakened before so it is probably good that it broke now and not during
use. I managed to find a vendor for the part and ordered it only to find out a month later that the lost my order so they finally shipped it... but when I got it I noticed that it was missing one
of the holes where the gear locks into the shaft via a spring pin. At the sacrifice of a drill bit, my dad and I were able to drill a new hole and attach the gear properly. Phew! Finally
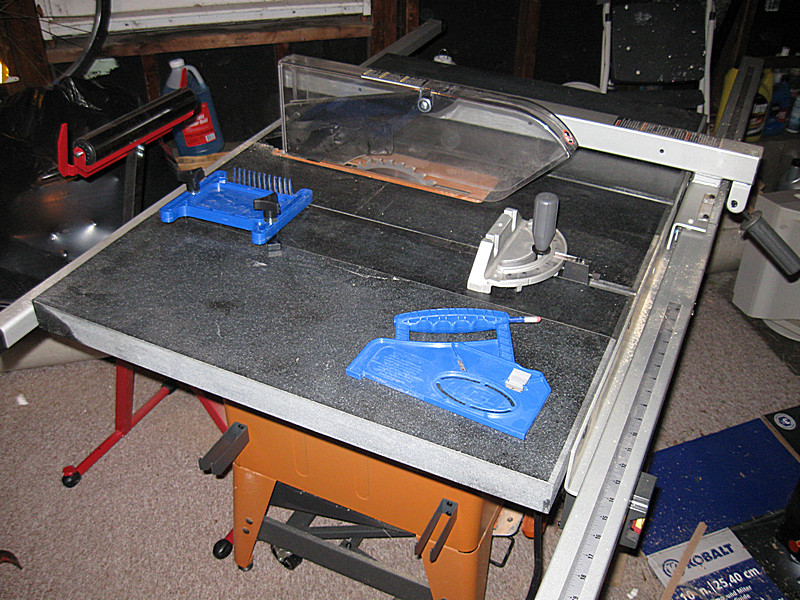
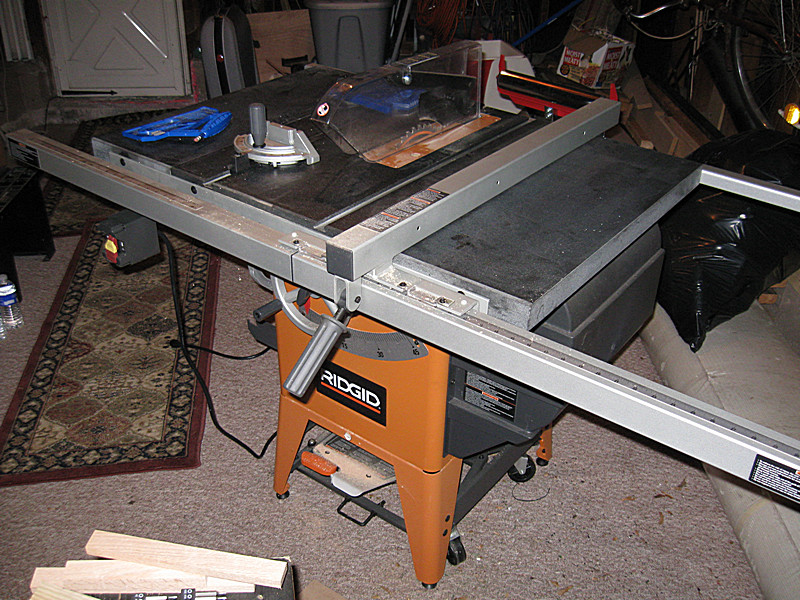
I was able to use my 1 year old, new, table saw and if you would ask me if it was worth all of the hassle, I would say, yes and more because it is quite phenomenal. Here's some pictures
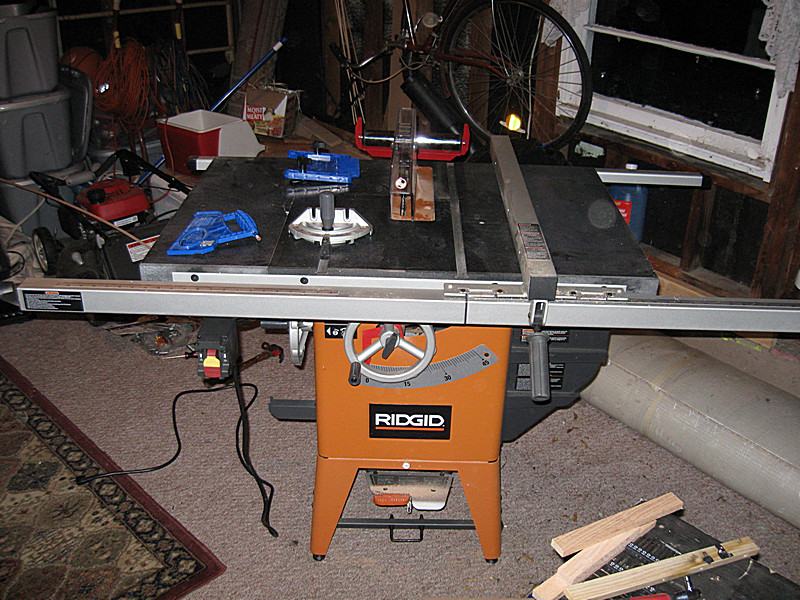
One of the great features of this extremely heavy table saw is the "Hercu-lift" system which allows you to raise the saw up on a set of wheels to move it and drop it back on its feet (you
can see it in the picture above, the orange pedal is the release pedal). I'll admit that most of my table saw experience was through my brother's $150 "Pro-tech" table saw, which I
thought was the most dangerous power tool I had ever used, but I couldn't be more impressed with the functionality and precision of this Ridgid R4511. The rip fence always locks perfectly
parallel to the blade and precise to the measurement gauge. I was always so accustomed to making test cuts to ensure the rip fence positioning but with this saw, that practice will
be a thing of the past. The miter gauge is very accurate as well and slides very easily within the groove of the granite top. I suppose that the one aspect that surprised me the most was
how quiet this saw is. It does draw a lot of current during start up but reaches full RPMs very fast and then all you hear is a mild whirring sound of the blade cutting the air. It gets a
little bit louder while cutting, but even with oak hardwood boards, it still isn't very loud. While I was in the garage cutting the side rails for the Black Knight, my dad was in the living
room watching TV and he said that he couldn't hear the saw at all.
The Oak Side Rails
I was finally able to cut the oak boards that I purchased over a month ago now that the table saw was fixed. Considering that the height of each side rail is about 1.125" I decided to
go with 3" wide oak boards which are actually 2.5" when measured. This would give me two side rails with very little excess due to the width of the saw blade. A while back
I was concerned about how accurate the lower side rails need to be because they are the platform for the upper playfield. That worry was put to rest when I cut the boards and saw
that after making two passes through the table saw to get the two rails, the thin slice of remaining wood was perfect in width along the entire 4' length of the cut. And all these
years I was always thinking that Norm Abrams had a degree in wizardry! I then used the miter gauge to cut the boards to length and adjusted it to around 35 degrees to cut the
angles in the upper playfield side rails. All of the cuts and rails came out perfect which was a big relief.
I had to modify the rear 3/4" oak rail at the back of the lower playfield with recesses drilled with a forstner's bit so that the t-nuts on the bottom side of the upper playfield don't prevent
the upper playfield from seating flat. With the original machine, the pine rails were soft enough for the t-nut to press into it. The next thing that I did with the rails was coat them
with one application of Tung Oil which dries fast and looks great, especially with oak because it takes it from pale to golden with accented grain. Once I saw them with the Tung Oil
I was really glad that I went with the real oak rails. There is only one possible negative consequence of using oak instead of pine and that is based on the fact that oak is much
more dense and rigid than pine which means that when the pinball hits an oak board rather than a pine board it is more likely to bounce back harder because the softer pine would have
absorbed some of the impact. With the Black Knight this only comes into play near the left and right outlanes so we'll have to see how it goes.
So the table saw saga comes to a close. I suppose that I tried to pack all of the frustration and joy that I had regarding this table saw into a few paragraphs but all in all I would have
to say that all of the trouble that it took to get this table saw home and running was all worth it in the end.
The Playfields Reunite
Now that the rails were cut and finished I could finally install them. With each one I simply clamped it in place, pre-drilled the holes through the playfield holes into the oak rail
and finally created a countersink for the screw head using a larger drill bit. I ended up using #6 x 1" wood screws which were plenty big considering the strength of oak. I didn't
mention this above, but I chose a different strategy for the upper side rails. Originally there was a gap where one side rail stopped and another started so that you could access
the playfield mounting screw. When I made the new side rails, I made them the full length with no discontinuities. I then drilled holes into the side rails for access to the
playfield mounting screws and was accurate enough for it to work well (there is very little room for error).
So now that all of the side rails were fastened and the upper playfield was attached to the lower playfield, I could start working on installing some more parts to complete
the upper playfield. At this point I had polished all of the stainless steel ramp parts and first attached the ramp side rails including those that connect to both playfields.
I didn't install the actual ramps themselves at this time so in the pictures below which show them, they are only laying in place. I lined up all of the plastics located on the
perimeter of the playfield and drilled the holes to mount them to the new side rails. While the original machine had silver colored screws in these locations, I chose to use
black screws because I liked the way they disappear into the artwork of the plastics. I had debated between using black rubber post caps for the plastics or nickel-plated
acorn nuts as post caps. I found that I like the way the black rubber post caps looked for the same reason I liked the black screws, however, I found that they didn't have very
much strength in terms of holding the plastics on and a lot of them tore fairly easily. In the end I chose to use a combination of black and nickel-plated post caps which seems
to look and work out well.
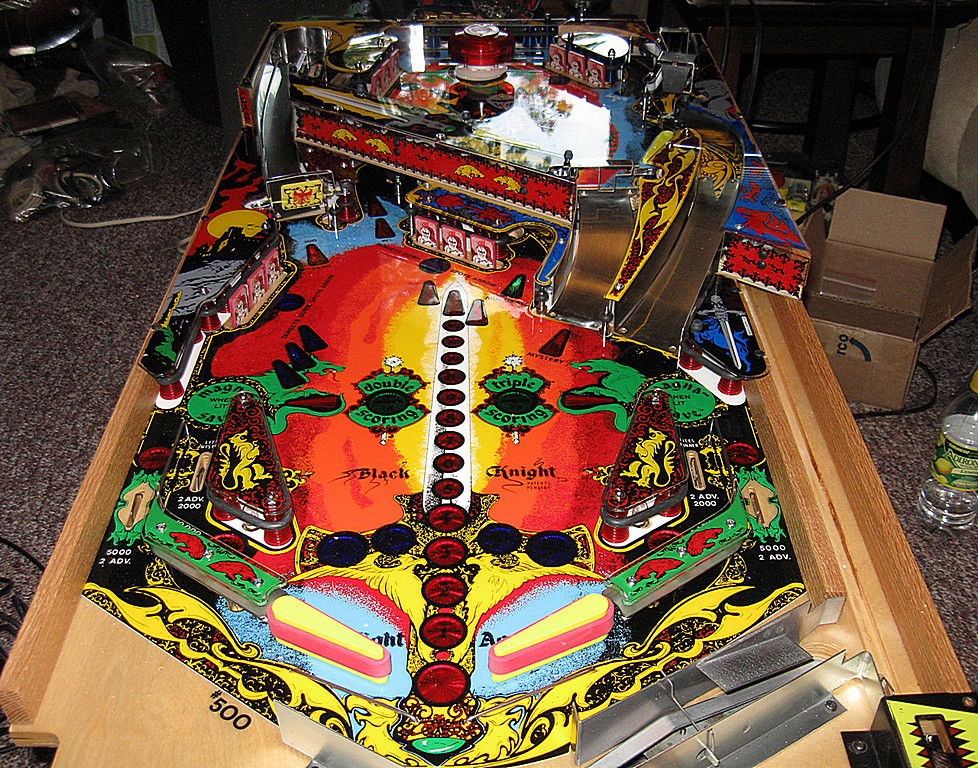
The next set of photos were taken after I moved the playfield back down to the basement, temporarily resting in the cabinet. As you can see in these pictures, the ramps are not installed yet.
I also have yet to install the lower spot lamps and a few other effects. Note the new oak side rails which glisten even in the photographs, quite a nice upgrade in my opinion.
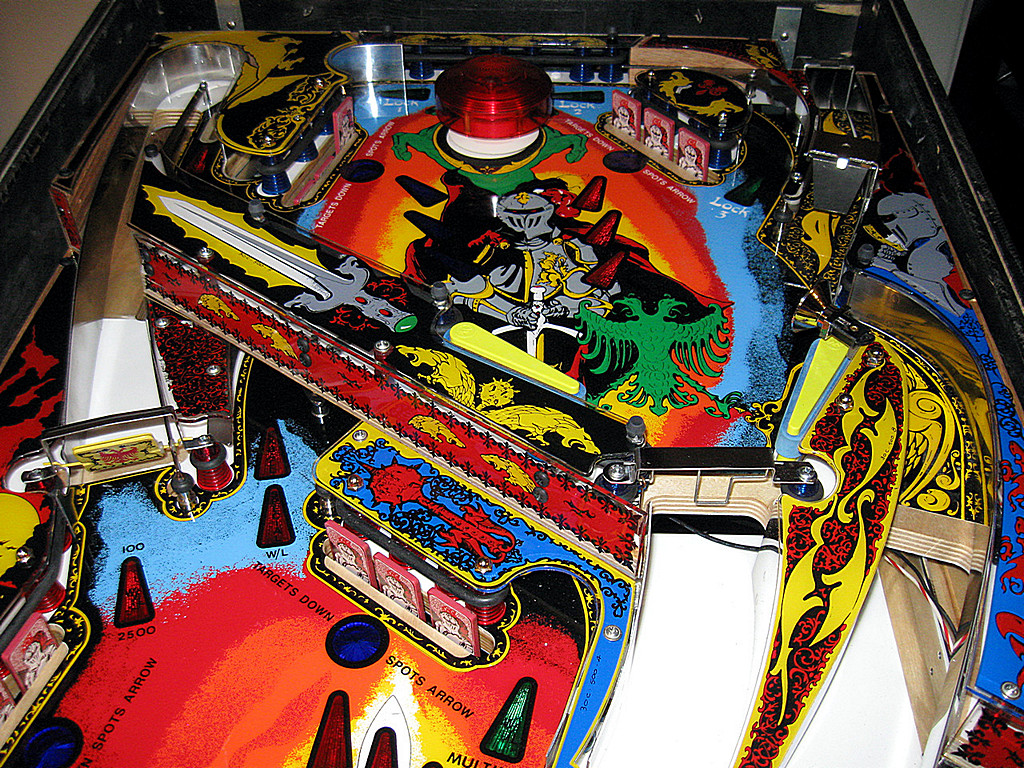
Below is a closer picture of the upper playfield which reveals some of the modifications that I've made including all blue posts (just the upper PF), blue flipper rubber rings, a
new translucent red pop bumper cap (needs to be trimmed) and new post caps. You can also see how reflective the ramp rails are now after polishing them to a near mirror finish
to match the mirror finish of new playfield.
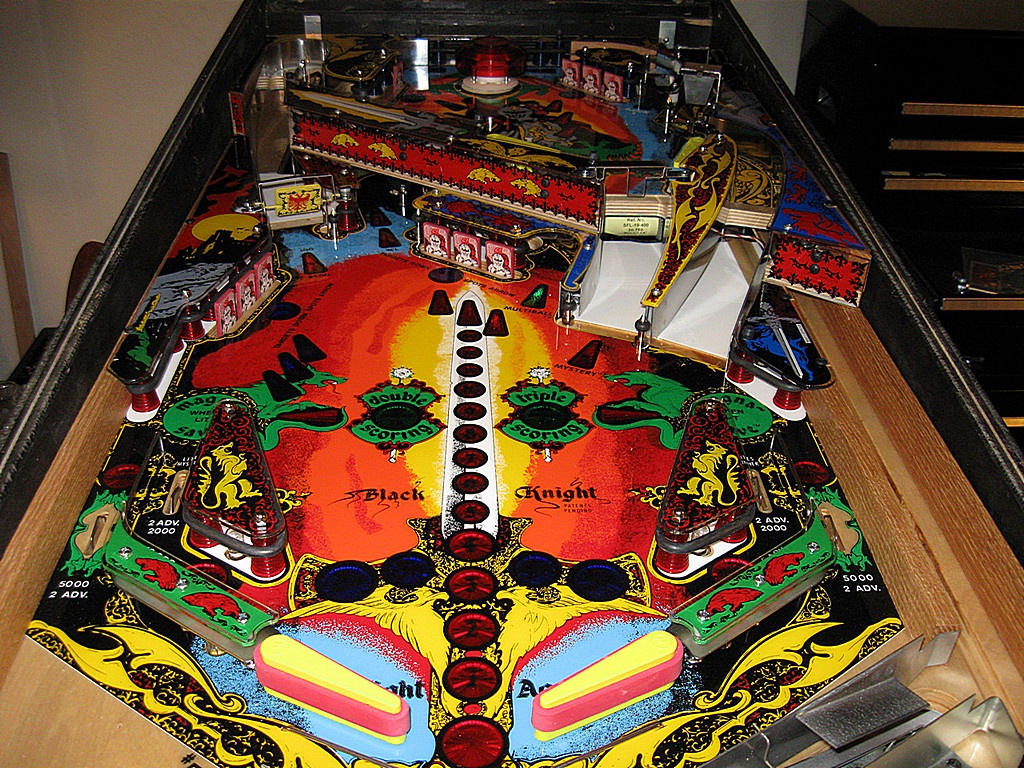
Now a low angle view of the lower playfield where you can see that I used the original red colored finned posts and flipper rubber rings. The original Black Knight had red finned posts
everywhere... both the upper and lower playfields. To be honest, I think that the red/blue playfield distinction might end up being one of my favorite features but it is tough to tell because
everything will be enhanced once the GI lamps are on. I may have said this before, but I chose to use black rubber rings instead of the original white rubber rings which tend to have
a higher elasticity as well as more grip which tends to introduce more english on the pinball. However, considering that the new playfield is clearcoated and is much more slick than the
original, I was worried that the ball physics would be too much if I used the white rubber rings which might take away some of the flow as well as introduce more randomness.
It may be a personal preference, but I've never felt that white rubber rings should be used on a flow-based pinball machine for the most part.
At this point the playfield is about 90% complete considering that I still have to add a few lamps and LEDs as well as wire up some relays and other things but it seems to be a
good time to move on to the next step which is to restore the cabinet.
 |
|